Challenge fights are unique, 'boss' style fights, that unlock after the player clears each respective area fully (passes subarea x-8). Each boss unlocks some powerful rewards on the 1st initial kill during that reincarnation, and has unique drops exclusive to that boss. They also grant increasing passive buffs to the player.
The player has to start the challenge/boss manually using the 'Start' button, and then kill the boss. Every time the boss is killed, the challenge fight levels up, granting the boss more health/damage and occasionally some new skills - but also increase the passive bonuses given. A passive stat reward is given based on all time max level reached, whereas a Drop Rate bonus is given for current level (capping out at +300%).
If a player dies, they will be put back to area 1-1, or whatever their favourite area is set to. If the player uses the 'Quit' button manually, they will be placed wherever they were previously when entering the fight.
When engaging a Challenge Boss, it is highly recommended that you enable battle animations (Shift + B) and disable nitro to ensure you have ample time to react to boss attacks.
Challenge Bosses[]
| Slime King |  |
Unlock Condition | Drops | |
|---|---|---|---|---|
| Clear area 1-8 | Black Pearl Shiny Slime Crown Slime Sceptre Slime King Core Acidic Goop Slime Eye Ball Slime Crown Slime Core | |||
| Rewards | ||||
| +1 Skill Slot +1 Equipment Slot | ||||
| Perm Stat + | HP % | |||
| Tactics and Movelist | ||||
Slime King is primarily an introduction fight to challenges, having simple mechanics, rarely troubling the user. It is, at it's core an 'add control' fight. It might take a little while to kill on first unlocking, but can be easily overpowered immediately after using a few ATK potions.
Mechanics of the fight will largely be ignored quite early in the game, with the player damage outstripping the mobs health/defences easily. Slime balls kill him while staying out of his range, the minions can still be a threat. Suggested stats/equip for reasonable kill - ?? | ||||
| Golem | 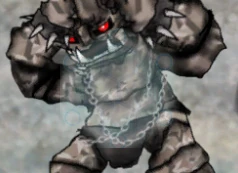 |
Unlock Condition | Drops | |
|---|---|---|---|---|
| Clear area 2-8 | Black Pearl Robust Bone Golem Shard Golem Core | |||
| Rewards | ||||
| Unlock Rank C gear 1 Equipment Slot | ||||
| Perm Stat + | DEF/MDEF % | |||
| Tactics and Movelist | ||||
The Golem is the second challenge boss the user will face. Typically, the Golem will be the user's precursor to reaching 4-4, as the boost that C rank gear provides will likely be sufficient for significant progression.
Suggested stats/equip for reasonable kill - Defense on par with it's ATK value | ||||
| Deathpider | 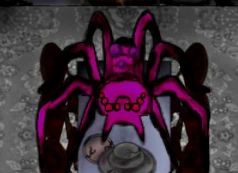 |
Unlock Condition | Drops | |
|---|---|---|---|---|
| Clear area 3-8 | Black PEarl Potent Venom Sample Spider Iron Silk Deathpider Core Venom Soaked Cloth Spider Heart Webbed Core | |||
| Rewards | ||||
| +1 Skill Slot +1 Equipment Slot | ||||
| Perm Stat + | ATK % | |||
| Tactics and Movelist | ||||
| Suggested stats/equip for reasonable kill - | ||||
| Fairy Queen | 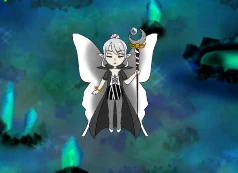 |
Unlock Condition | Drops | |
|---|---|---|---|---|
| Clear area 4-8 | Black Pearl
Fairy Queen Dust | |||
| Rewards | ||||
| Unlock Rank B Gear +1 Equipment Slot | ||||
| Perm Stat + | MATK % | |||
| Tactics and Movelist | ||||
***INCOMPLETE***
Unless you charge into her range before her first bar appears, the fight starts with fireballs. She increases her attack after the first fireball barrage, details and additional attacks as of yet unresearched. Suggested stats/equip for reasonable kill - | ||||
| Bananoon |  |
Unlock Condition | Drops | |
|---|---|---|---|---|
| Clear area 5-8 | Black Pearl Rotten Banana Ripe Banana Bananoon Core | |||
| Rewards | ||||
| +1 Skill Slot +1 Equipment Slot | ||||
| Perm Stat + | SPD % | |||
| Tactics and Movelist | ||||
The general fighting strategy is to stay close when he doesn't throw bananas and to move away when he does.
| ||||
| Montblango | 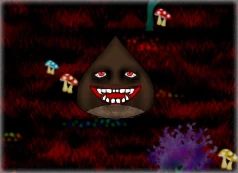 |
Unlock Condition | Drops | |
|---|---|---|---|---|
| Clear area 5-4 | N/A | |||
| Rewards | ||||
| Ability to Reincarnate 1 Heart Stone | ||||
| Perm Stat + | +200 SE | |||
| Tactics and Movelist | ||||
The base premise is that Monty is invincible (although only because he has 1e100 def/mdef *10 per level), and players must 'burn' him with fire skills to build up a 'charge bar' (red bar above his skill use bar). When the bar is filled, Monty will lose his defences, and become vulnerable to all/any dmg. The player should focus high dps in that time, and rinse repeat as necessary.
With high enough defence (e20+ golem shield etc) the player can practically negate most incoming damage barring yellow charge (puddle) which appears to be HP% based, so can not be ignored. If you can dodge all his shots (some skill and movement speed are required), golem shield isn't needed. The red bar mostly responds to the number of fire based hits - Fire Storm is the most effective spell, at least if you can stay close enough most of the time. Suggested stats/equip for reasonable kill - Golem Shield e12+, DPS > 1e18 | ||||
| Octobaddie | 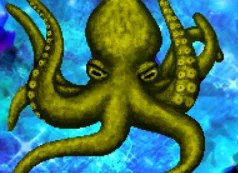 |
Unlock Condition | Drops | |
|---|---|---|---|---|
| Clear area 6-8 | Black Pearl Severed Tentacle Octopus Eye Octobaddie Core | |||
| Rewards | ||||
| Unlock Rank A gear +1 Equipment Slot | ||||
| Perm Stat + | MP % | |||
| Tactics and Movelist | ||||
Octobaddie does not move, but a number of their attacks take up much of the screen. Also, the screen partially and fully blackens at times, making it impossible to see the balls from Octobaddie, so you may want to learn the patterns before spending many consumables.
Suggested stats/equip for reasonable kill - DPS > 1e25 | ||||
| Distortion Slime | Unlock Condition | Drops | ||
|---|---|---|---|---|
| Clear area 7-8 | ?? ?? ?? ?? | |||
| Rewards | ||||
| Unlock Rank S gear +1 Equipment Slot Curse Reincarnation | ||||
| Perm Stat + | EXP % | |||
| Tactics and Movelist | ||||
| Distortion Slime does not move until a Bananna hits them. Once a Bananna hits them, they move around frequently, pausing occasionally until the bananna bar has been filled too many times. Every fill of the bananna bar does damage (25% of current) and reduces the Distortion Slime's stats. Once the bananna bar can no longer be filled, Distortion Slime is immobile.
Distortion Slime has two attacks - a black one that takes up most of the screen, and sharply reduces HP (to 1?), but does not kill (note that this is not damage - this is HP reduction), and a red one, which is close range, and is a standard attack. Banannas (from Bananna Cutter) fill the yellow bananna bar while Distortion Slime has one. Every time that bar is filled, Distortion Slime takes 25% of their current HP. After a number of fills, the bananna bar is no longer shown, and Distortion Slime is once again motionless. Suggested stats/equip for reasonable kill - DPS > 5e35, Bananna Cutter +3 or higher. | ||||